Written on December 9, 2013
By Tony
in Revolvers
The Smith and Wesson Model 631 was only made from 1989-1992, and as a result, can be hard to find, and when you do find one, they are generally expensive. I looked for one for a number if years before finally finding one for a price that I could afford, at a time that I had the money to afford it.
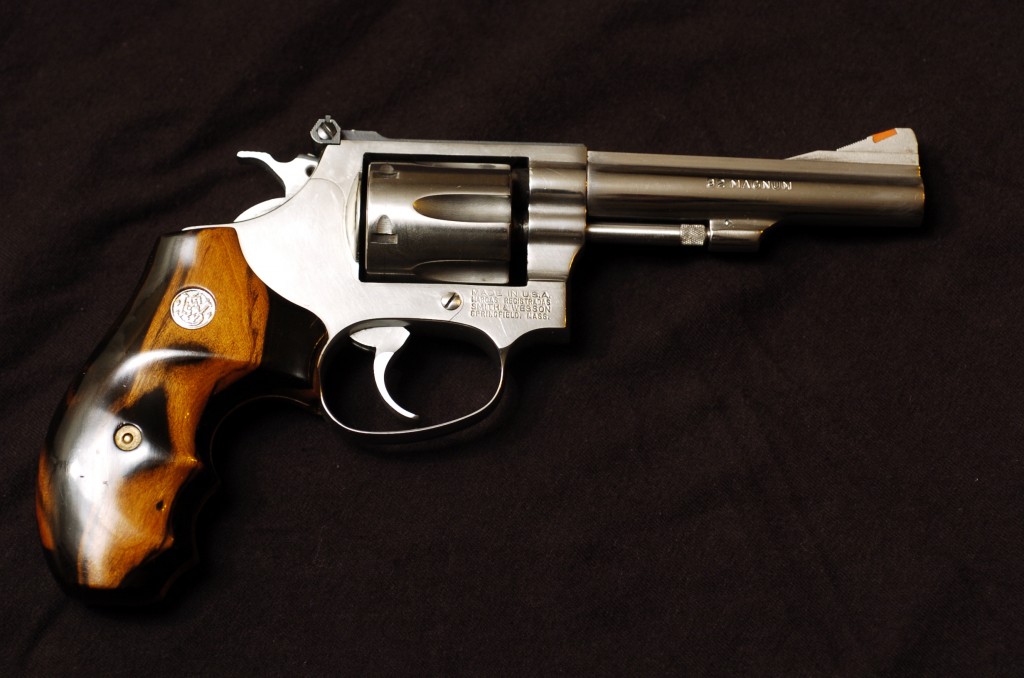
S&W model 631 4″ barrel and adjustable sights
The 631 is a stainless steel J-frame revolver chambered for the .32 H&R magnum cartridge. Of course, the chambering also allows shooting the .32 S&W long and .32 S&W cartridges as well. The original run had two variations, the ‘kit gun’ and a snub nosed version. The kit gun is the type I wanted, and was able to find, it features a 4″ barrel and adjustable sights, the snubbie features a 2″ barrel and fixed sights.
My version of the 631 is accurate, and a joy to shoot, liking any ammo I’ve fed it. The gun weighs about 24 oz, and as such is very light and enjoyable to carry in the field, packing enough punch to give peace of mind when dealing with the various things that might give one problems in my neck of the woods, while still being tame enough to take small game for the pot without being needlessly wasteful.
In 2011 S&W introduced a new revolver that they called the 631. It has a 3″ ported barrel and is chambered for the .327 federal magnum cartridge. It also has adjustable sights. I had the opportunity to shoot one shortly after they came to market, but found that the porting made even light .32 S&W long loads unpleasant to shoot without good hearing protection.
Written on December 3, 2013
By Tony
in Bullet casting, Reloading
Some Helpful tips that will make getting started with bullet casting.
1. Pre-heat the molds before starting to cast. I like using an electric hot plate with a piece of copper on the top (the copper helps distribute the heat to the mold evenly). Since hot plates are all a little different, finding the right temperature setting takes a little experimentation. I find that a medium setting is a good place to start. Some molds need a higher setting than others, and some need lower. Iron molds generally need more heat than aluminum and brass molds.
2. Clean a new mold with soap and hot water. I use a stiff bristled toothbrush to scrub. When I store a mold long term, I use oil to preserve the cavities, and so when pulling a mold out of long term storage I also scrub with soap and hot water.
3. Use a cotton towel or other natural fiber cloth to catch the bullets as they fall from the mold. Synthetic fibers may melt, natural fibers generally won’t.
4. Size is important. I try to make sure that the bullets are at least .001″ oversize for the bores of the guns I’m planning to use them in. Sometimes .002″ works better. I use a number of sizing tools to make sure the bullets are uniform, depending on the application.
5. Use as soft an alloy as possible for the caliber. “hard cast” bullets are popular from commercial casters, but I only use hard alloys when I’m shooting rifles at a high velocity. Softer bullets generally shoot more accurately and produce less leading.
I hope those tips will help out, and if you have any questions, Please let me know, and I’ll try to answer them.
Written on December 2, 2013
By Tony
in Bullet Molds
The Hensley and Gibbs company, which started in the garage of George Hensley in the 1930’s (back then it was simply the Geo. A. Hensley company) is world renowned for the fine bullet molds they produced while they were in business. Their gang molds have been the standard that every other mold has been held to for a long time.
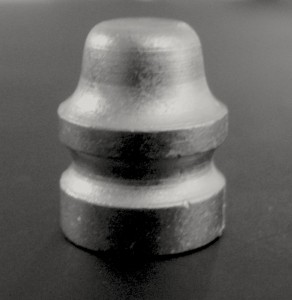
The H&G #130 bullet was designed as a lighter weight SWC design for the .45 ACP. The design is similar to that of the Lyman 452488 mold that I wrote about a few weeks ago. The main differences are the wider meplat of the H&G design (A meplat is the flat tip of the bullet) and in this case, the inclusion of a bevel base to the design. The design was added to the company ledger in 1949, with the ledger containing a note saying that it was ‘very very popular’ as a lighter weight target bullet for the 1911 shooters.
Bevel base bullet designs are known for a few things, they are popular with commercial casting companies, as they tend to drop from the mold easily, they are a pain in the backside to lube in a Lyman, RCBS or Saeco type lube-sizer, and they are often considered to be less accurate than their flat based counterparts, all things considered. I admit that I haven’t noticed a difference in the accuracy between bevel base and plain based bullets, but I’m shooting in the real world, and I honestly believe a lot of the theoretical edge is hyperbole. Since I use a Star or balisticast sizer for my .45 bullets, I have no issue with sizing and lubing BB bullets. They also make progressive loading a little smoother than PB bullets, and require slightly less working of the brass. And the mold dropping issue, it’s hard to say; I’ve never had a H&G mold that didn’t release pretty cleanly.
The H&G #130 is spec’ed at 185 grains in linotype. My mold throws bullets that are .453″ in diameter and about 192 grains from my (significantly softer) alloy. I have no need for linotype metal for my bullets in the .45’s that I’m shooting. Functionally, the bullet feeds very well in almost all of my guns, and is a favorite in the Performance center tuned 625, and is quickly becoming a favorite in the Reising. I’ve only had this particular mold for a short time, but it’s not my first H&G #130 mold. I specifically wanted this one because of the BB design, to help ease the reloading for the Reising. Once I have another 10 or 20 thousand of them cast and loaded, I’ll let you know how that’s going.
Written on November 19, 2013
By Tony
in Repeaters, Rifles
The Mauser 105 was made in Germany in the 80’s. It’s production started shortly after Mauser bought the german portion of Voere. The design is based on the earlier Voere 2005 rifle, and differs in only small details, such as the threaded barrel, and variation in sights.
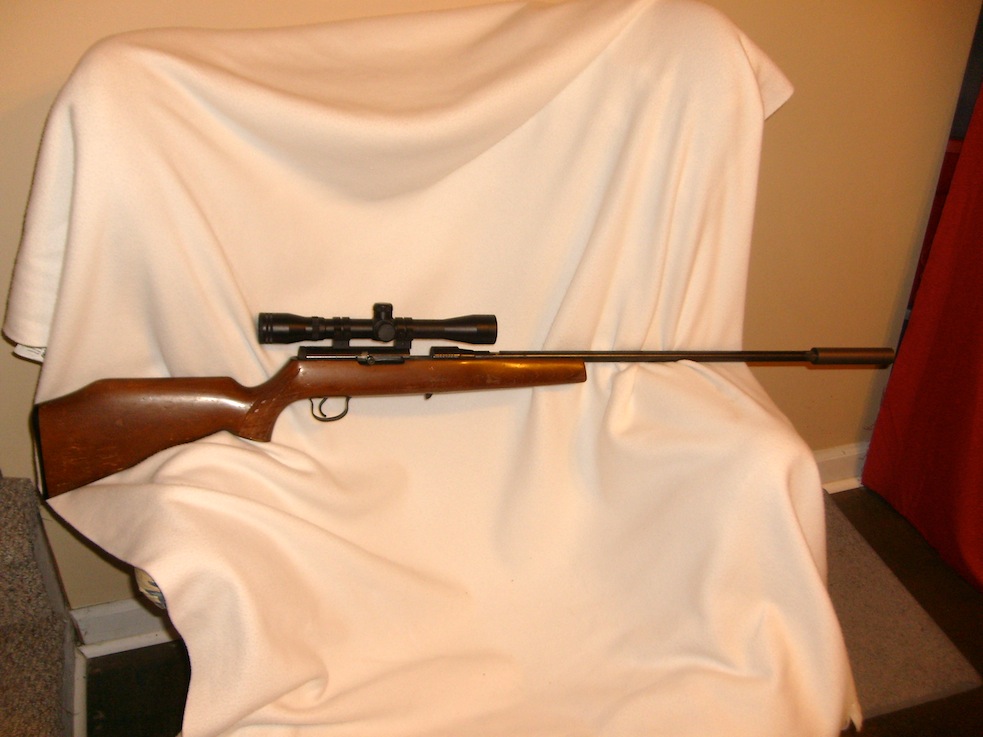
It’s a .22 caliber semi auto with a 24″ barrel. From the factory the receiver was grooved for a scope (11mm or 3/8″) and has tangent rear and hooded front sights. My rifle has had both sights removed. The rear was removed to give clearance for the scope, and the front to make it look better since the rear was gone. I placed the sights in a baggie marked with what gun they’re from and put them in the back of the safe.
The muzzle is factory threaded with the european standard 1/2″x20 TPI. I’ve added an adapter to mine to allow the use of a 1/2″x28 TPI suppressor. The stock is beech or something similar, and mine has seen better days, but is solid and serviceable. Don’t let the picture fool you, it’s got a lot more scratches and dings than you see.
The problem I had with the rifle when I got it, was that it came without a magazine, and there are no magazines readily available for it. I’ve heard that a H&K model 270 magazine could be modified to work, but with the prices on those climbing to $100 or more, I decided to see if I could do something else. In the end, I opened up the magazine well in the trigger housing some, and modifying a Bingham model 20 magazine to fit. It functions pretty well, but I wouldn’t recommend the same thing to someone else, instead find the magazine for a Jennings J-22 and modify that to fit (I have a second 105 that I’ve done this with, it keeps the gun original that way)
The gun has been reliable with just about anything I’ve tried in it. CCI SV has proven quite accurate as well, though I haven’t tested anything else very extensively.
Now let’s talk about what makes this gun very different from most of the .22 semi auto rifles you’ll find at the range or at the local gun shop. The method of operation of most semi auto .22’s is simple, when you pull the trigger, the hammer strikes the firing pin, crushing the primer and firing the round. The recoiling case pushes the bolt back, cocking the hammer again. As the bolt closes, it strips another round from the magazine feeding it into the chamber, leaving the gun ready to fire another round.
The Mauser 105 is an open bolt semi auto. What that means is that when you pull the trigger, the bolt closes, stripping a round and feeding it, a raised ridge on the bolt face fires the round when the round is fully chambered. Then the recoiling case pushes the bolt back where it locks in place, ready to start again. The Open bolt system is very simple. There’s no firing pin and no extractor, in fact, the entire bolt is just one solid piece of machined steel with a bolt handle that screws into the side.
I have found that the little Mauser is lightweight, easy to shoot well, and with a suppressor, very quiet (with subsonic ammo). If you can find one, I think you’ll be pleased. I like mine so much that I bought a second one when I had the chance. Im glad I did, as I haven’t seen another one since.
UPDATED:
I realized I forgot to add a picture of the rifle with the magazines I’ve fitted the rifle for. These are two 15 round magazines and a 25 round mag.

Written on October 29, 2013
By Tony
in Handguns, Semi Autos
Well, I started this project a while ago, and I’m getting closer to the final product now.
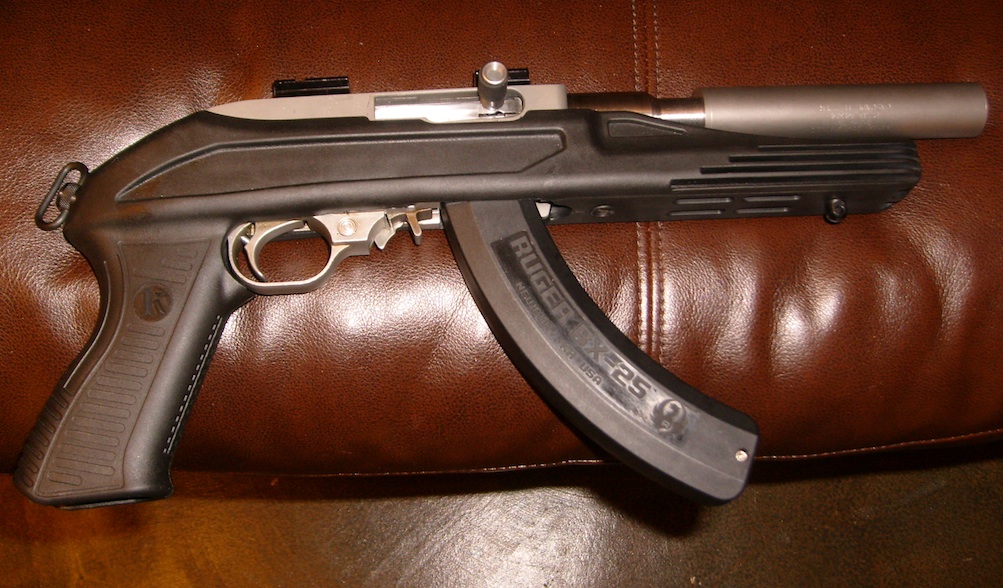
The stock is an Knox Axiom charger stock, chosen mainly because it was cheap. The Receiver is a Solid stainless unit from MOA industries. (You must start with a never before used receiver or a pistol receiver to make a pistol) The trigger assembly is a Solid stainless steel unit from an 80’s vintage AMT lightning. The Barrel is 3.5″ and was cut down from a standard barrel. The barrel is threaded and custom chambered.
The short barrel was chosen to reduce the overall length of the finished gun. One issue with the short barrel was unreliable function. 4.5″ is generally considered the minimum on a 10/22 type pistol for reliability. I slicked up the inside of the receiver and the bolt to help, but the biggest difference was the Kidd charging handle. With all that, it runs great with a 3.5″ barrel and the short barrel keeps even the hottest bulk pack type ammo subsonic.
With the Tac-Sol suppressor, the gun is reliable, quiet and running well. When I get my stamp back the gun will be going in a custom folding stock and become an SBR.
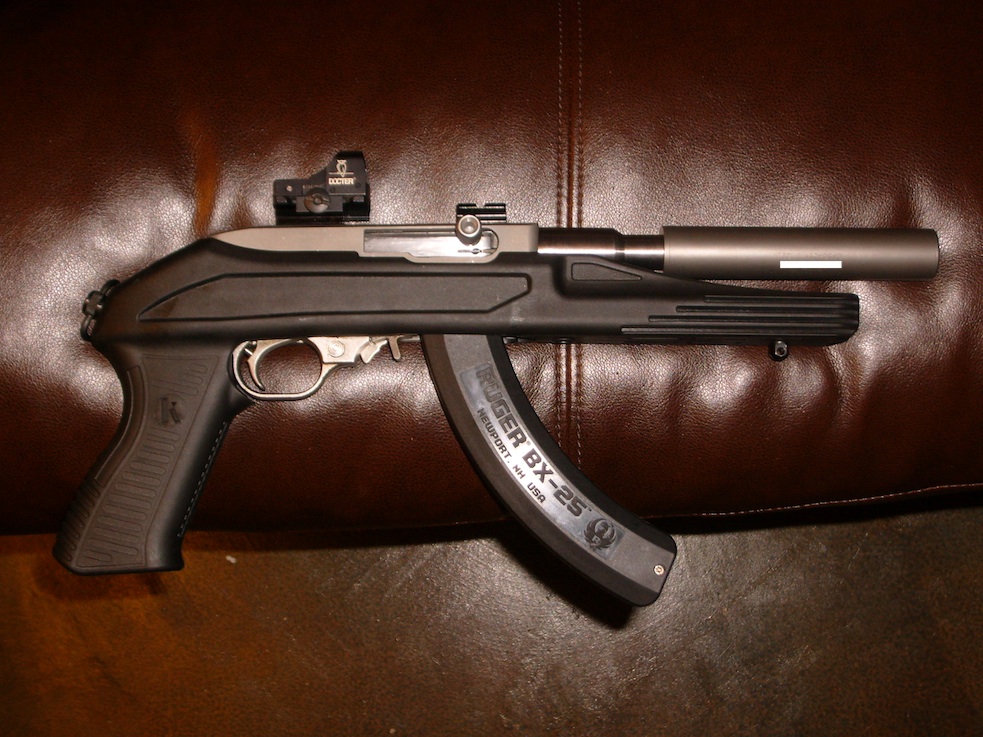
I decided to give it a try with a ‘Docter’ brand red-dot sight. It looks a little funny, but we’ll see how it shoots:
Written on October 23, 2013
By Tony
in Bullet casting, Reloading
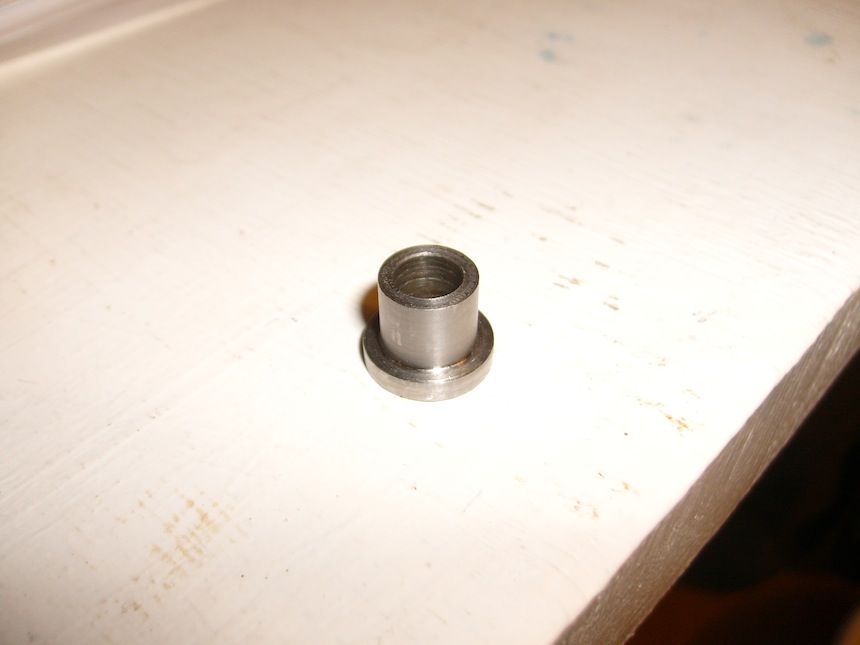
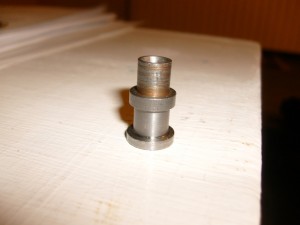
Several years ago, I was experimenting with pan lubing rifle bullets to try to get the last bit of accuracy I could. I was having good results, but I wanted a simple way to seat gas checks before pan-lubing the bullets. This is what I came up with, and the same tool would be handy for tumble lubing bullets as well.

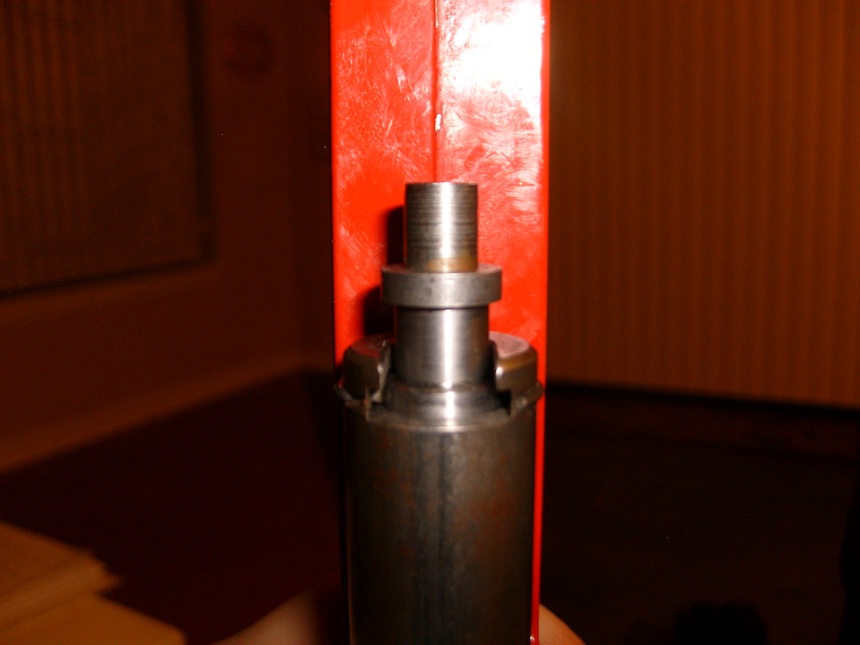
It’s a simple enough piece, and only took a few minutes on the lathe. What does it do? It holds Lyman style top punches like so:
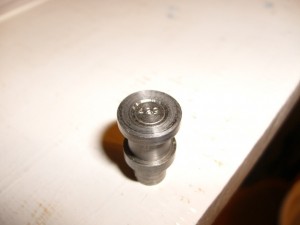
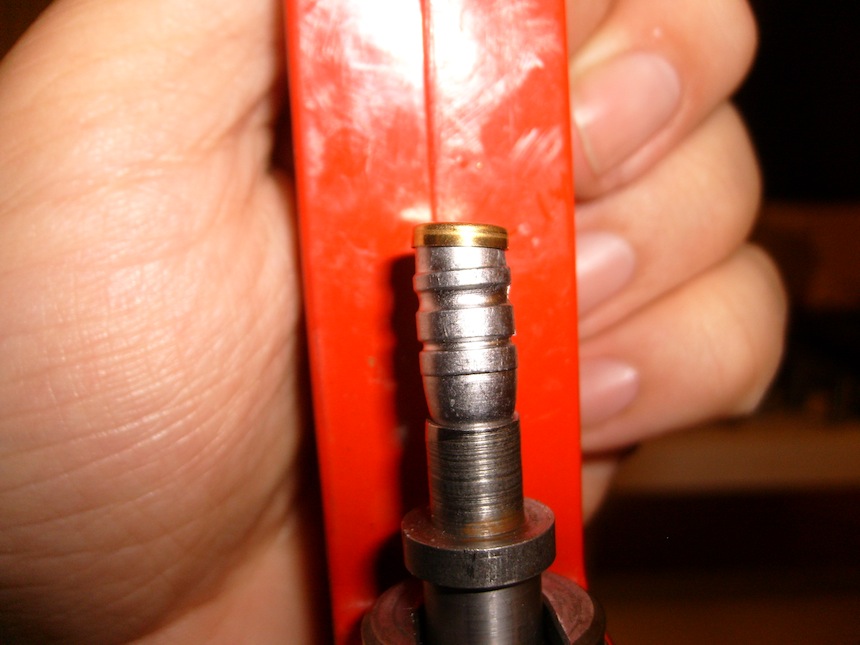
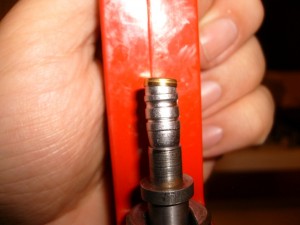
The top punch seats into the holder, and slips into the shell holder of a reloading press like so:

Allowing me to place any bullet that I had a top punch for into the holder, place a gas check on the shank, and raise the ram to seat the gas check on the bullet.
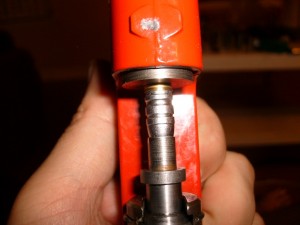
I made a special blank die to seat the gas checks against, but I would recommend anyone else just turn a die with a flat top upside down and thread in from the bottom. You don’t need much leverage, and you really don’t want to be seating the check at the end of the stroke anyways.
The dimensions for anyone who would like to make one:
Base diameter: 0.538″ or 13.65mm
Body diameter: 0.390″ or 9.95mm
Height: 0.435″ or 11.1mm
Through hole: 0.267″ or 6.8mm
Enjoy!
Written on October 20, 2013
By Tony
in Bullet casting
I think just about everybody who has considered casting bullets has at some point pondered whether they could shoot cast lead bullets designed to use a gas-check without one. I know I did.
I don’t have scientific data to give you on the subject, just the results of some testing that I performed so that I would know for myself.
The testing I performed consisted of firing up to 100 rounds each of 3 different bullet designs. All of the designs were known to be accurate in the guns that I was testing in. The alloy was the same as what I normally use for the bullets with the GC in place. Each design was tested loaded to several levels. All loads were within book loading data. The loads ranged from roughly 800 FPS up.
I was looking for 2 things when assessing the loads; Accuracy and Leading. All bullets were sized and lubed using the same sizing dies and lube as they would have been if wearing a gas check (usually .001 or .002 over groove diameter, depending on what the throat would allow). None of the loads produce any leading when used with a gas check, and all have proven at least reasonably accurate when using a gas check as well.
Rather than boring you with all of the details, since my results were the same across the board with each of the 3 designs tested, I’ll simple say this: All of my experimentation leads me to believe that 1100 FPS is about as hard as I am able to push a gas check bullet without a gas check before I see accuracy drop off, or leading start. If accuracy fell off, I made a note of it and pushed on. If leading started, I ended the experiment. Each design saw failure in one area or the other somewhere between 1100 and 1200 FPS. The loads that lost accuracy continued to be pushed to see if accuracy was re-acquired with more pressure. In all cases leading started by about the 1400 FPS threshold. None of the loads regained accuracy before starting to lead.
Please don’t take that as gospel, as I said, my experiment was far from scientific, and any number of variables could have changed the outcome. A harder alloy might have gained me some velocity, a different lube might have allowed me to push them harder, etc. etc. etc.
What my experiment told me was that it’s worth trying a gas-check design of bullet without the check for a low powered load. It might not pan out, but there’s a good chance that it could. If I feel like I’m going to want to push a bullet over about 1000 FPS though, I am likely to either use a gas check on the design, or start with a plain based design. I have had success pushing plain based bullets to velocities as high as 1500 FPS without loosing accuracy or seeing any leading. I assume that some of the reason for that is the thickness of the base driving band on the plain based bullets. Generally the wider the base driving band is, the harder I can push the bullet before I start to see leading or a loss of accuracy.
If you have experience with this, please let me know how things worked for you!
Written on
By Tony
in Bullet casting, Bullet Molds, Reloading
I’m a cheapskate. That much is a given. This is part of the reason I cast my own bullets for my guns. Being a cheapskate means that I’d rather not incur unneeded costs when doing things. For virtually every pistol load I can think of, a factory gas-check would be an unneeded cost.
The Lyman 313631 mold was designed for the .32 H&R magnum cartridge. It’s a gas-check design that weighs about 100 grains and has a Keith-esque SWC profile. The mold was discontinued sometime in the 90’s and as a result is a rare one to find, it was only cataloged for about a decade, maybe less.
For a long time I used the bullets from the mold sparingly, I had plenty of other molds for the caliber, and I hated spending the money on the gas-checks. about 2 years ago I started experimenting with the bullet both with and without gas checks. I found that over a light load of bullseye or a similar fast pistol powder, without a gas-check, the bullet provided good accuracy when loaded to about 800 FPS.
When I started experimenting with the hotter loads using gas checks, (I’ll explain in another post why I push a plain based bullet faster than I will a check less gas-check bullet) I discovered that when pushed to about 1200 FPS in the .32 H&R, the bullet provided Excellent accuracy with no leading. When fired in a rifle with slow powder and a gas check at about 1400 FPS, the bullet made groups that were just ridiculously small.
All this was well and good, but I come back to being a cheapskate. So I dropped my experimentation, and went on to using other bullets. Until a few months ago that is. I made a trade with someone and acquired a .30 caliber gas check making set. After a little trial and error, I was making some beautiful Aluminum gas checks using .014 aluminum flashing material. The thickness was perfect for the 313631, and the checks were easy enough to get started, and then seated and crimped on to the shank very well.
Now once again I’m experimenting with faster loads and the 313631 bullet. Loading in the .32 H&R case over an upper book level charge of red-dot powder, I’m getting excellent accuracy from several guns, and I expect that the load would do quite well on game up to medium sizes. I need to break out the chronograph and finish testing, but I think I may try to take a og this winter with the S&W model 16-4.
Written on October 17, 2013
By Tony
in Bullet casting, Bullet Molds, Reloading
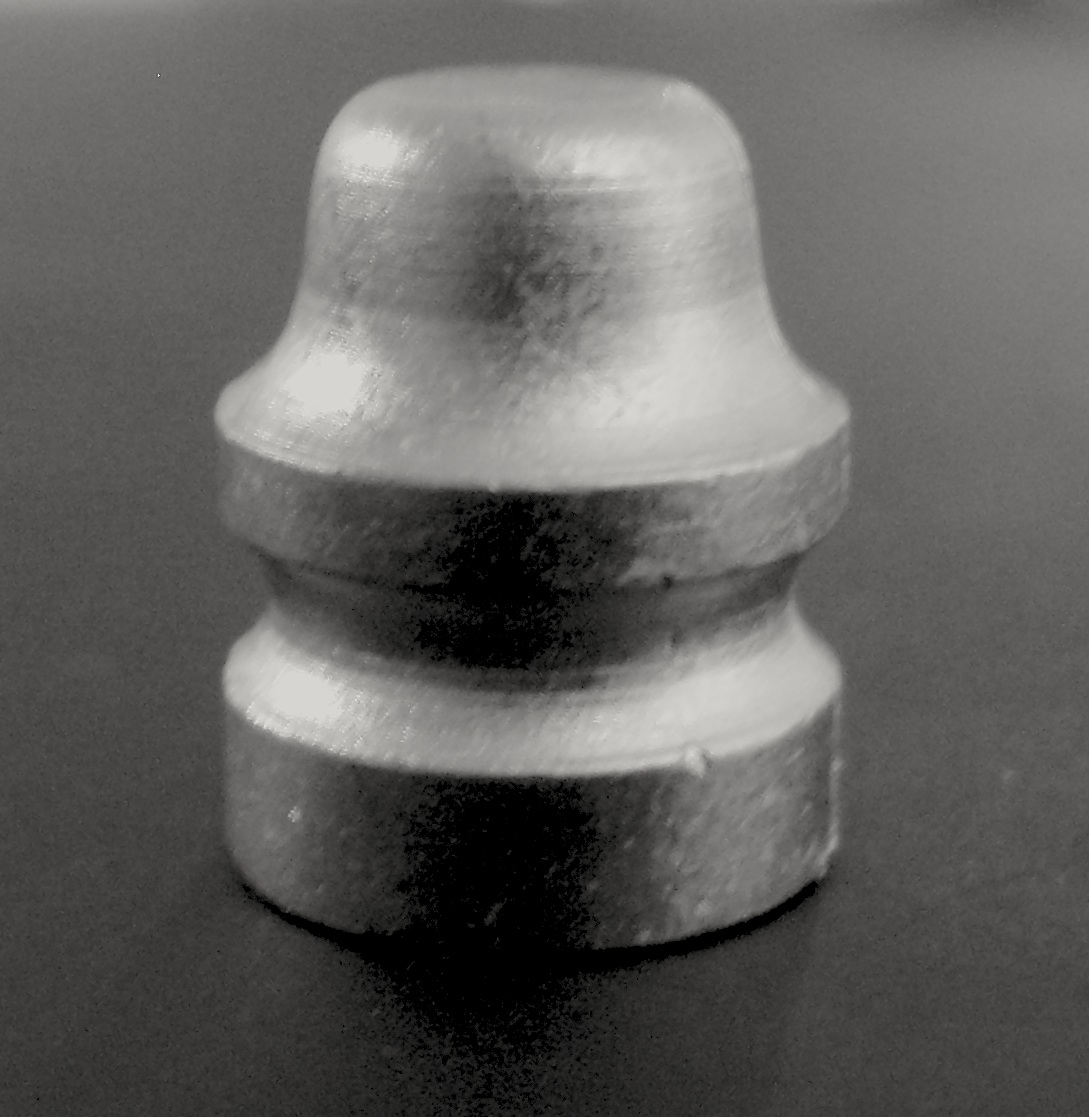
The Lyman 452488 is a semi wadcutter design, meaning that instead of just a round nose, it has a shoulder with a flat point ahead of that. The 452488 has a fairly rounded sweeping shoulder and a short nose. It is very similar to the Hensley and Gibbs #130 mold. According to the Lyman catalogs, the 452488 should weigh 185 grains when cast from Lyman #2 alloy. When cast with my alloy, they run about 192 grains from my mold.
The 452488 bullet design works very well in virtually any revolver chambered for the .45 calibers (though a bit small for some of the older .45 colts with larger groove diameters) and will often run just fine in most of the auto’s as well.
The mold that I have is a 4 cavity version purchased used at a gunshow several years ago, along with a number of other molds. I didn’t use it right away, because I had other .45 molds. When I did start using the mold I was pleasantly surprised by how easy it was to cast with, and what excellent results I received from the mold.
After getting the Reising earlier this year, and doing some experimentation, I discovered that the bullet is both functionally excellent, and pin-point accurate in that gun. This is the point when I express how glad I am that I have a 4 cavity of the design, I can’t imagine sending the time it would take to run this as a double cavity, let alone a single. I wish of course that it was a 6+ cavity mold, but I’ll settle for 4 considering the results with the Reising.
After seeing how well the design did in the reising, I revisited the bullet in both my Para Ordnance and the S&W 625. I still need to run through some more testing with the other .45’s that I have, but I can say for certain that the bullet, with a reasonable load, is capable of excellent accuracy in all of the guns that I’ve done any extensive testing in.
All in all, I like the 452488 a lot, it saves me lead over casting a full 230 grain RN, feeds and functions well in all of my guns so far, provides excellent accuracy, and the design makes the mold a breeze to cast with. If you can get your hands on one, I recommend it.
Written on October 10, 2013
By Tony
in Machine Guns, NFA
Some friends and I shooting the Reising M50 SMG over the course of 2 range trips about a month apart.